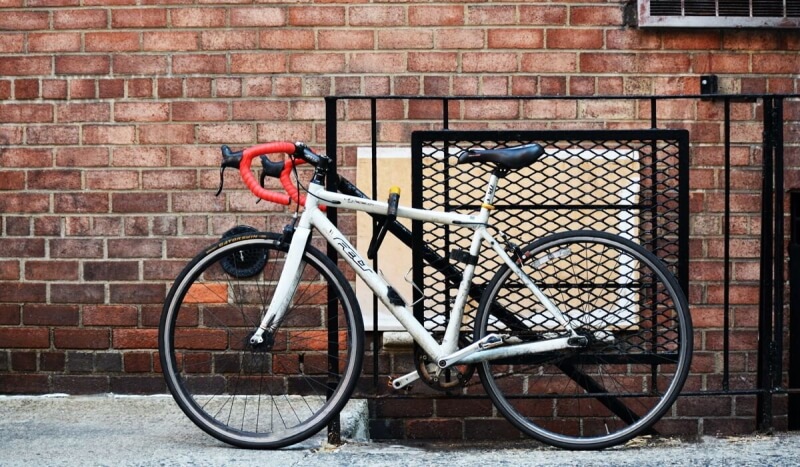
- Trails
-
Bikes
-
Gear
-
Tips & Tricks
-
About us


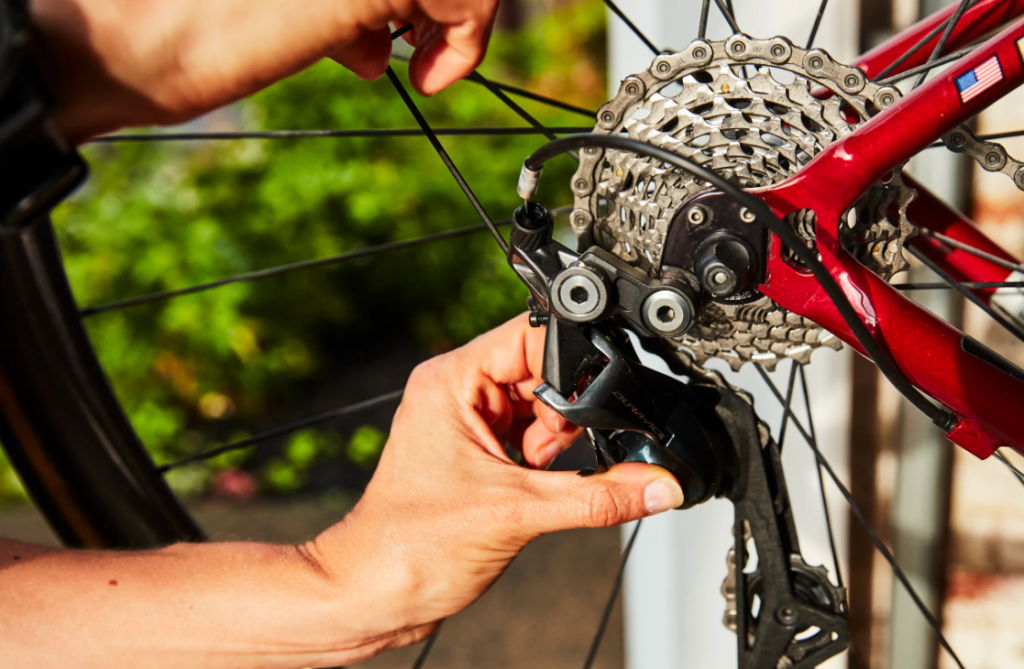
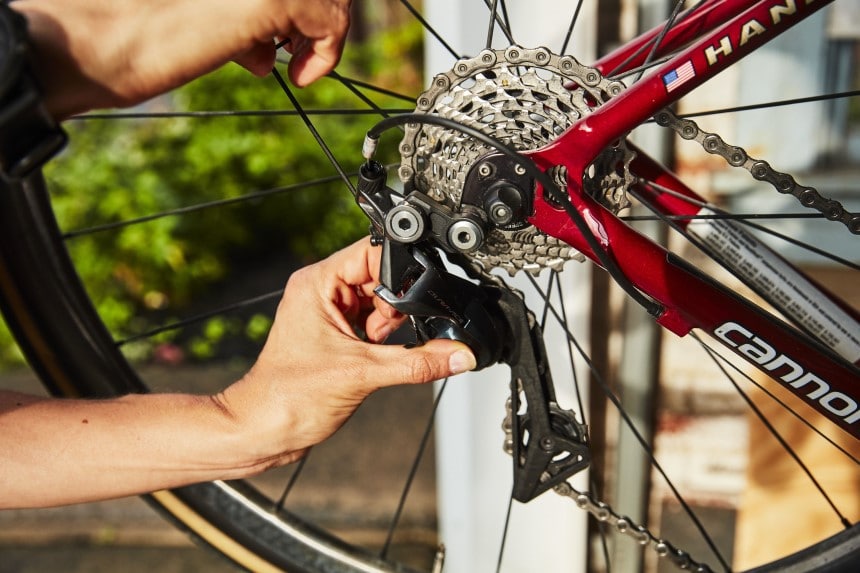
What could be more annoying than getting derailed when your rear derailleur is not shifting through the gears as it should? Your derailleur is the most crucial part of the drivetrain. If you want to shift gears easily you must ensure your derailleur is in great shape. Today’s bikes are built with a lot of gears and their braking systems are a lot more complicated, hence the need for derailleurs.
Most of them come with front and back derailleurs Trusted Source Shop tip: overview of derailleurs – Community Cycling Center This shop tip is all about creating a basis for more in-depth knowledge. Whether you’re working on a bike you already own or are preparing to buy a new one, it’s very helpful to be familiar with all the different types of components. Knowing their names, their uses, and their limitations can help you be prepared to ask the right questions and make well-informed decisions. communitycyclingcenter.org . In this post, we will show you how to install a rear derailleur. This is the most critical component of the bicycle. Everytime you set off on your bike, cycle up an incline, or make a stop, your rear derailleur comes into play. Read the information below, and you’ll never have to call for help whenever it is not in a good working order.
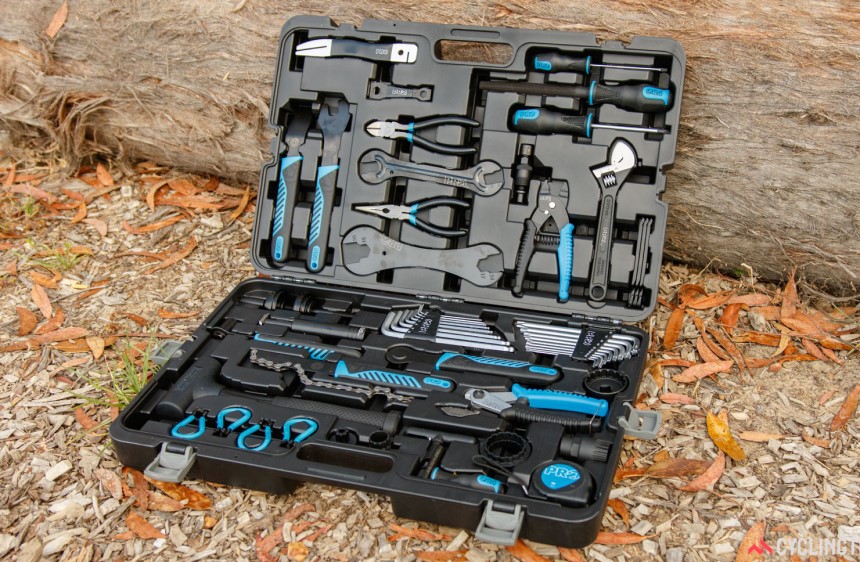
To install a rear derailleur on your road bike, or any other type of bicycle, you need the right set of tools to install and set up a new rear derailleur. Some of the key tools you must add to your arsenal include:
· Allen keys
· Cable cutters (According to popular reviews, the Muzata stainless steel cable cutter is one of the best cable cutters on the market. It is a top favorite for many because it gives sharp and clean cuts. Also, it comes with 4 pieces of bike brake cable cap end tips as a gift.)
· Phillips screw driver
· Pair of pliers
· Chain pliers or any chain break tool
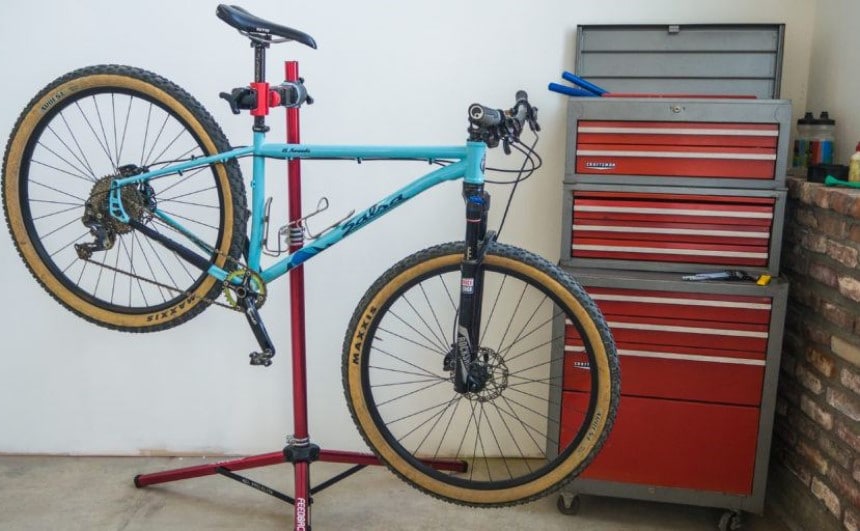
· A bike stand
You can get the tools from the nearest hardware or online. Alternatively, you can purchase an all-inclusive bike tool kit like the highly acclaimed Ruby-Q professional bike repair tool kit. It comes with 44 pieces of bike repair tools that you can use to service virtually all types of bikes.
 Removing an old derailleur
Besides cleaning a bike chain and tightening it, regular derailleur checkups should also be part of your bike maintenance routine. A well-adjusted derailleur should not make any noise. If you get any noise from the derailleur when shifting gears, then it may need to be adjusted.
If the noise persists after adjusting the derailleur, then you may need to replace it. You can as well go to a bike shop to diagnose the issue and fix. Some of the things you should look out for when inspecting your derailleur include:
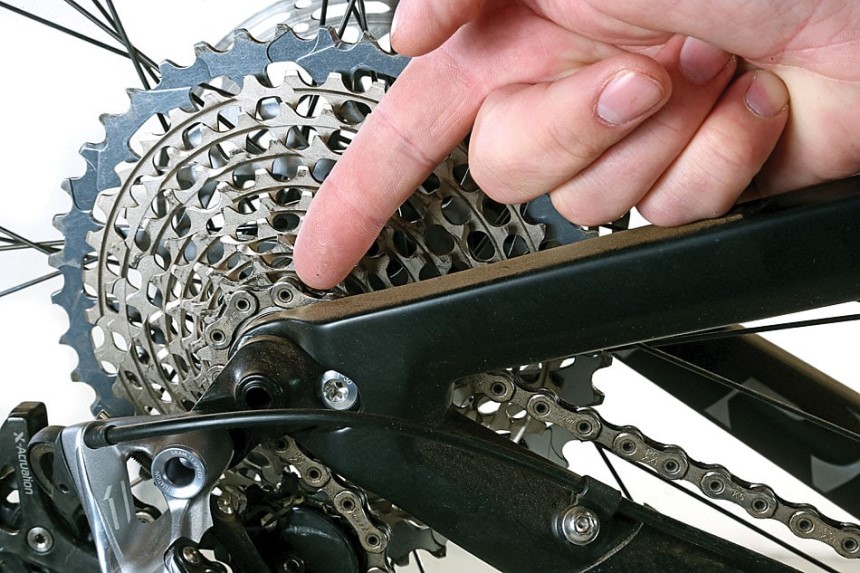
· The chain line up- the chain should line up smoothly with every chainring. Here are some clear guidelines on how to put a chain on a bike correctly.
· Debris in and around the derailleur and chain.
· The derailleur cage should not rub against the crankarm.
· The chain should be in its position.
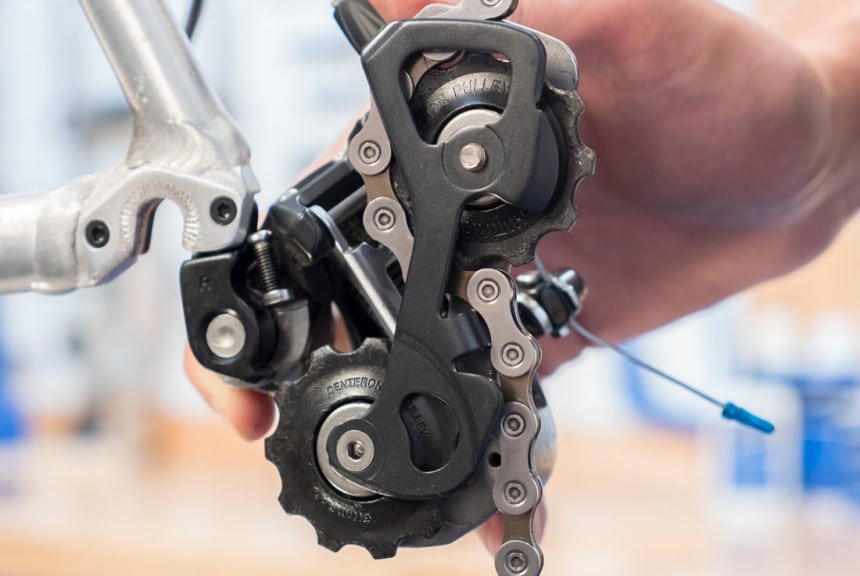
Before you attach a new derailleur, you must check if the old one needs replacement. Ensure the derailleur’s jockey wheels aren’t broken in anyway. A derailleur can break because of many reasons like:
· Over shifting into the spokes- this happens when your low limit screw is not well set. Consequently, the derailleur moves too far beyond the largest cog.
· When you let the bike fall over on its right side the hanger gets bent and the derailleur breaks. The hanger can also get bent from an accident.
· If the derailleur has manufacturing defects or it is the cheap kind, then it means that some of its parts are so weak that even a slight vibration of the bike can break it.
· If debris gets in between the bike chain and derailleur, it could easily break.
· Cumulative wear and tear can also cause the derailleur to break.
Once you have identified the problem with your derailleur and you realize replacement is the only option, you have to think of the next step which is getting a new one and installing it. Removing the old derailleur is the first step to installing a new one. Here is a step by step guide:
Put your bike into a bike stand then shift the chain into the smallest sprocket.
 Step 2
Disconnect the shift cable by pulling off the shift cable’s end cap. Loosen the cable pinch bolt then remove the shift cable from the derailleur.
 Step 3
Remove the chain from the derailleur. You can remove and install your rear derailleur without breaking the chain if it comes with the master link. The master link is the quick-release link that allows you to connect and disconnect the chain without needing a chain tool. If your bike doesn’t come with a master link, you will have to use a chain tool.
 Step 4
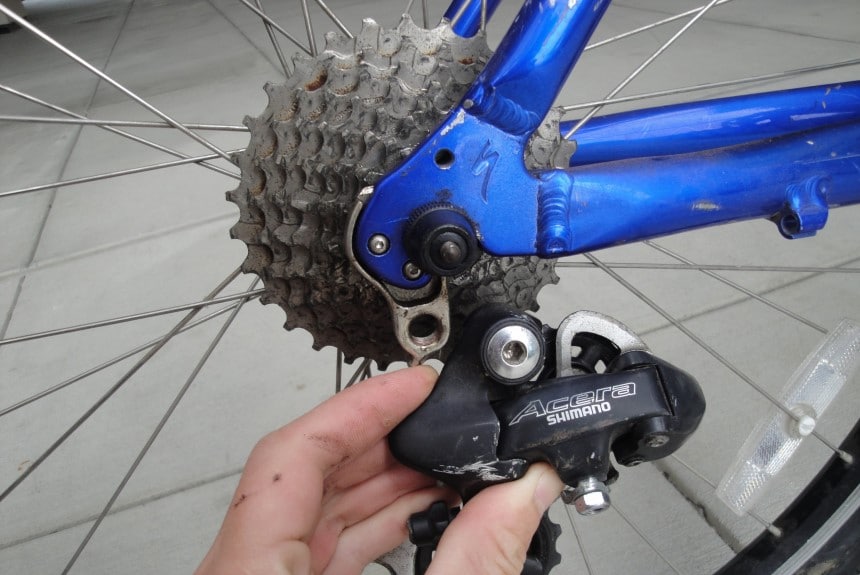
Remove the rear derailleur by winding it counterclockwise. You can unthread the derailleur’s mounting bolt.
 Installing a new derailleur
Before you install the new derailleur, you have to ensure that its hanger is in top shape. Perform a quick visual inspection to see that the threads are not damaged in any way and there isn’t any other obvious damage. The last thing you want is to install a new derailleur on a damaged hanger.
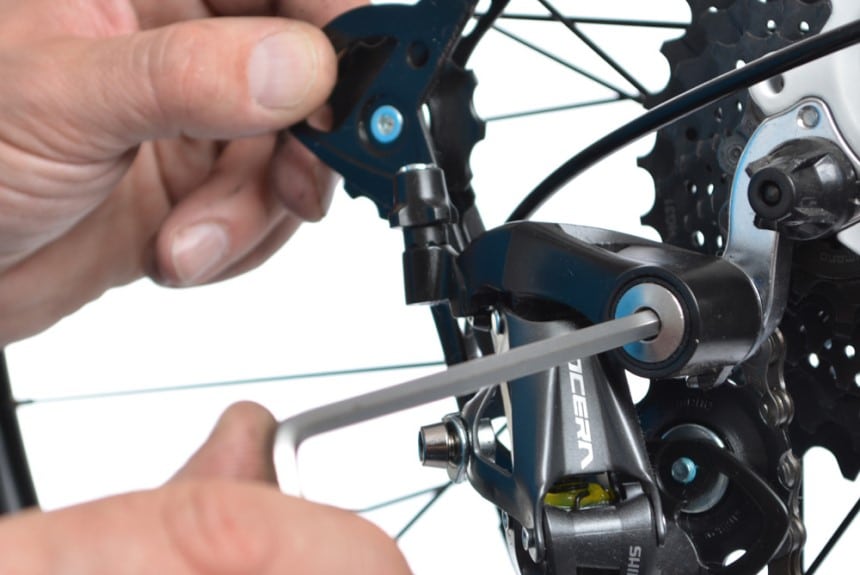
Mount the derailleur to the mounting bolt by turning it anti-clockwise then tighten it fully once it’s in place.
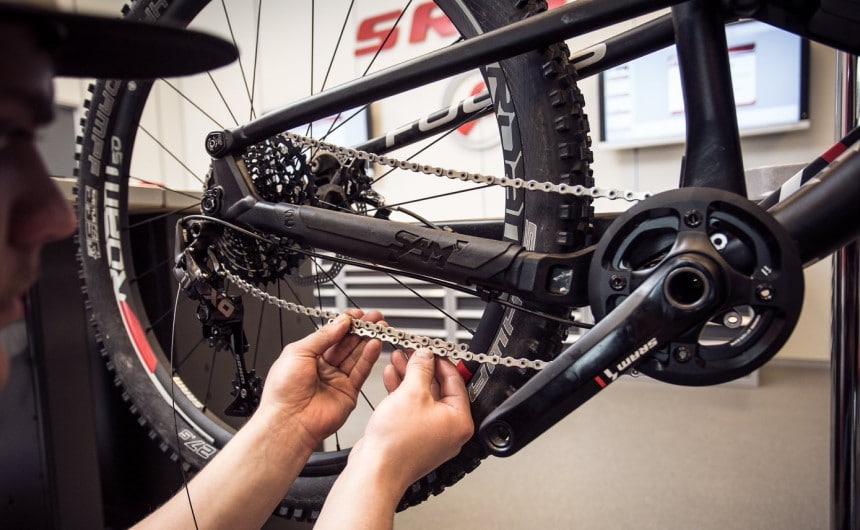
 Step 2. Putting the chain on
Put the chain back on.
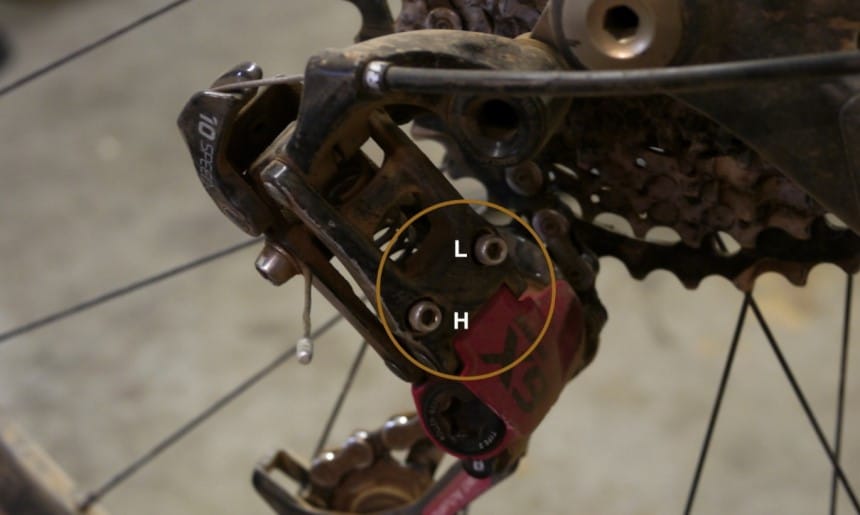
 Step 3. Setting the limit screws
Set the high limit and low limit screw. The high and low screws are meant to limit the derailleurs movement in either direction. They prevent the derailleur from getting thrown off the cassette.
You can start with the high limit screw by turning it clockwise with the Allen key so that the derailleur moves towards the bigger cogs. Do the same for the low limit screw so that the derailleur moves towards the smaller cogs.
 Step 4. Putting the shift cable
Put the shift cable back into the derailleur. Pull it tight, before tightening the anchor bolt so the cable flattens.
 After successfully installing the new derailleur, you must adjust it and test it. You can do this by ensuring the upper jockey wheel is in line with the smallest cog when you look from behind.
The cable should also be seated snug without any slack. Pull it tight then re-tighten it to remove all slack.
If there is so much cable left hanging, use a cable cutter to trim it then crimp it with a cable end cap. Run a test to ensure everything is running smoothly before you go out biking.
Pro Tip: regular cleaning and maintenance of your derailleur will make it last longer. Derailleurs get dirty too fast because they support a greasy bike chain and the wheels throw so much dirt and debris on them.
Here’s what you can do to clean and lube your derailleur on a regular basis:
· Spray it with a degreaser. You don’t have to disassemble the derailleur to clean it, most times a good degreaser sorts out the greasy dirt.
· Use a brush to remove the dirt that collects in the cages of the derailleur. You can remove the chain if you want, but you’ll still be able to do a great job with it on.
· Scrape the grime off the jockey wheels with a screw driver then use a rag to wipe it off.
· The jockey wheels also tend to wear out with time and grow teeth-like spikes. Replace them if you find them not blunt enough. If they are still good shape apply some lube on them. Ensure the lube you use is appropriate for the weather.
· Grease all the 4 pivots on the rear derailleur regularly. If the pivots begin to stick, they lead to poor shifting. After applying the lube, move the machinery around to help it settle in place.
A rear derailleur is as crucial to a bike as brakes are to a car. It comes into play when you set off with your bike, when you make a stop, when you cycle up an incline, and when you build up speed as you move from lower to higher gears Trusted Source Bike Gears Explained: A Beginners Guide To Bike Gears Bike Gears Explained | Guest post by Jeff Luckett explaining the basics of gearing on a bike, how to choose the right gears for you and using them properly. www.yellowjersey.co.uk . Quite simply, for you to change gears smoothly, your derailleur has to be in top shape. If you love doing maintenance on your bike yourself, then installing a new derailleur will be a breeze to you.
If you learn how to install a rear derailleur to your bike, you would never summon a mechanic every other time its functionality is compromised. On the flip side, if you are not the DIY type, then you might want to seek professional advice. A DIY derailleur installation can end up causing more damage that would be too costly to fix if you don’t have the right tools or you have no idea what you are doing.