- Trails
-
Bikes
-
Gear
-
Tips & Tricks
-
About us


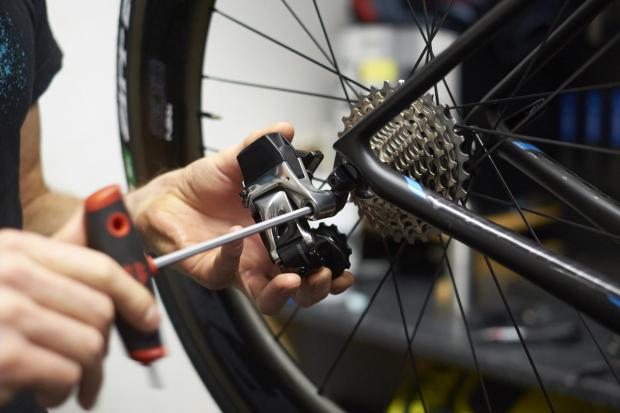
Would you like to know how to install front derailleur Trusted Source Derailleur - Wikipedia en.wikipedia.org ? The process of mounting and adjusting the front derailleur of a bicycle involves several essential steps to ensure that the chain moves from one chainring to another without major problems.
The front derailleur installation and adjustment procedure begins with a first phase. This is related to the revision of the orientation and location of this component with respect to the height and distance of the plates.
The second phase has to do with the regulation of the distance between the derailleur plate and the chain to avoid friction. The last process concentrates on adjusting the tension of the control cable and the screws that act as physical stops to limit the operating range of the derailleur.
Although this initial explanation may seem a bit complex, we are going to try to break it down so that you acquire the basic notions of maintenance and be able to adjust the derailleur at home.
So, take note of the following steps and start identifying how the front derailleur works in conjunction with your bike’s chainrings and the knob setup cable.
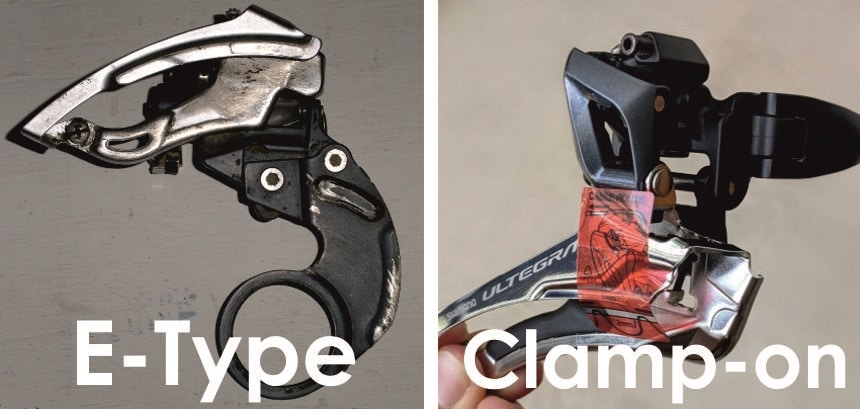 Before you begin to replace the old front derailleur and install a new one, you have to know that there are two types of derailleurs: welded and braze-on derailleurs.
In this guide, we will show you how to install the SHIMANO FD-M310 front derailleur or SHIMANO Ultegra R8000. The installation technique is basically the same for all Shimano derailleurs, whether it is Shimano 105, Tiagra, Altus, Sora, Claris or Torney. But it is also interesting to note that the process for mounting the front derailleur of other brands is very similar. The differences are minimal.
Like what’s required with rear derailleur installation, the first step involves making a general review of the bike chainring before starting.
The initial step of the front derailleur adjustment process begins with a general check of the plates in the machine. Keep in mind that most traditional bicycles, whether road bikes or mountain bikes, incorporate a triple chainring set in their transmission system.
Therefore, it is necessary to check in detail that the teeth of each of the crowns are in perfect condition and do not show bumps or bends towards the outside of the bike or the inside of the frame.
A slight flaw in the original design of one of the chainrings can disrupt the proper functioning of the front derailleur and impair gear shifting on the road or in the mountains. If you find one of these problems, do not hesitate to replace the faulty crown or repair it as soon as possible.
Once you have evaluated the current state of the chainring design, proceed to start the process of installing and adjusting the front derailleur.
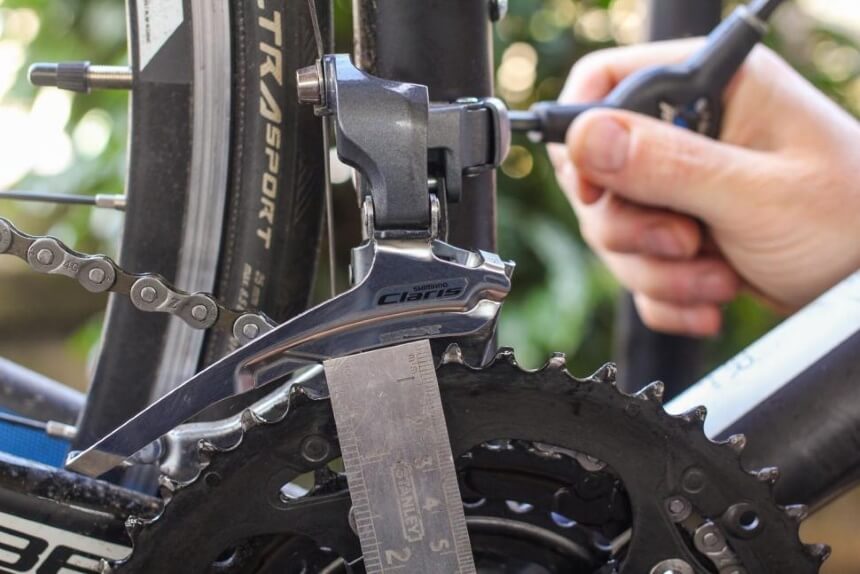 In this phase, the position of the derailleur with respect to the chainrings must be correctly calculated. Powertrain experts recommend that the derailleur should be installed
at least two millimeters or three millimeters above the highest tooth
Trusted Source
Front derailleur adjustment - How to adjust bike gears in six easy steps | Cyclist
Front derailleur adjustment is easy when you know how, so follow our guide to set yours up in minute
www.cyclist.co.uk
of the largest chainring.
In this phase, the position of the derailleur with respect to the chainrings must be correctly calculated. Powertrain experts recommend that the derailleur should be installed
at least two millimeters or three millimeters above the highest tooth
Trusted Source
Front derailleur adjustment - How to adjust bike gears in six easy steps | Cyclist
Front derailleur adjustment is easy when you know how, so follow our guide to set yours up in minute
www.cyclist.co.uk
of the largest chainring.
The angle also plays an important role in mounting, and that is why we must make sure that the derailleur is installed parallel to the crowns.
Placing the system at that height will ensure that the adaptation of the chain to each of the chainrings is carried out properly and quickly.
 When you have completed the initial steps, you will have to modify the development of the bike and put the changes in combination with a large sprocket and small chainring. In this phase, proceed to modify the physical stops to limit the operating range of the derailleur and the chainrings.
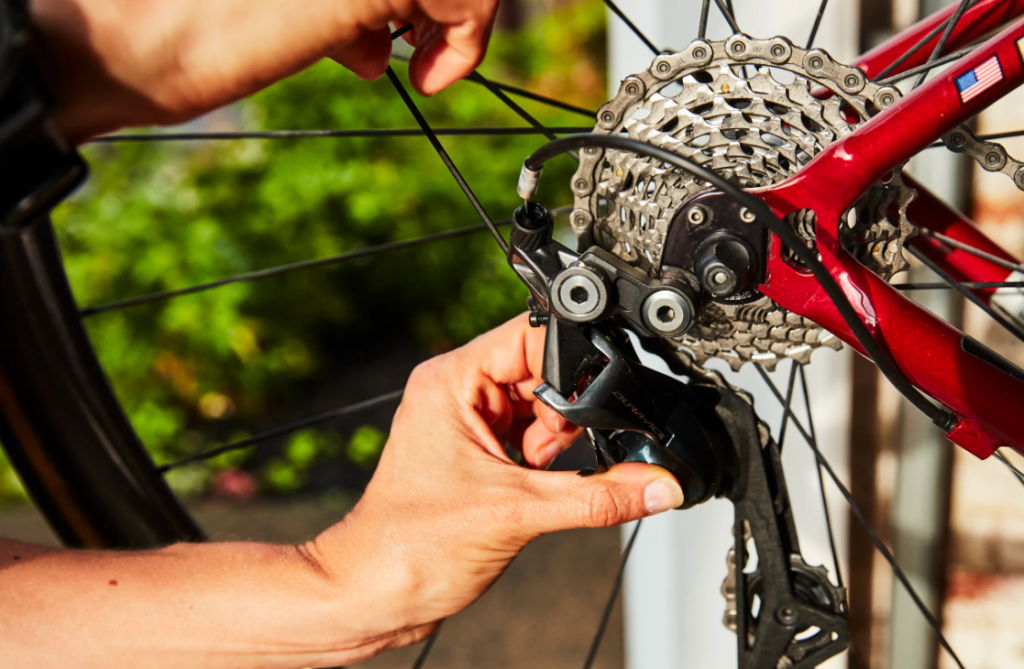
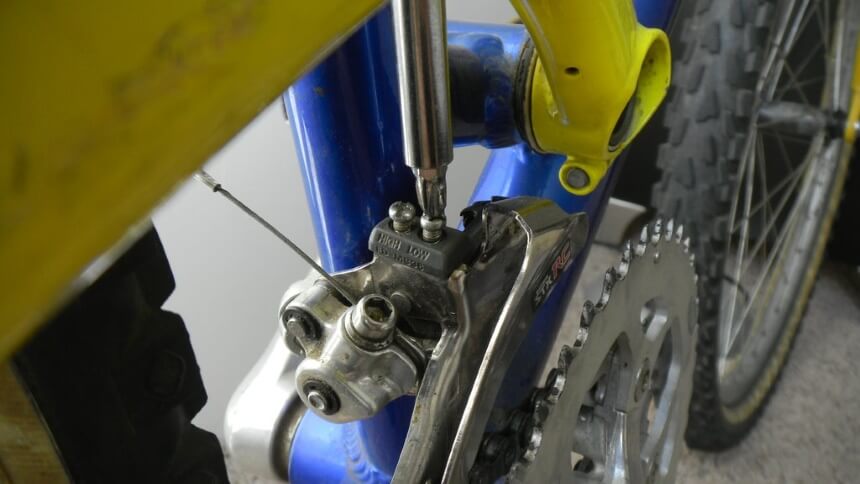
In this vein, you will take a good look at the front derailleur as a whole, and you will identify a pair of bolts that are marked with two letters: H and L.
Both nuts are the famous physical stops responsible for regulating the range of action of the mechanism, and the letters that are assigned to the screws are not there by chance. The H is the acronym for High Velocity and is the screw that directly affects the limit of the largest plate; for its part, L is the acronym for Low Speed and is the screw that acts on the smallest plate.
So, when you are clear on both concepts, you should adjust the stops to ensure that the chain does not collide with the inner plate of the derailleur. Mechanics insist on the importance of the distance between chain and derailleur at least one millimeter.
Tip: Carbon frame bicycles such as gravel bikes have frames with slots to screw the derailleur.
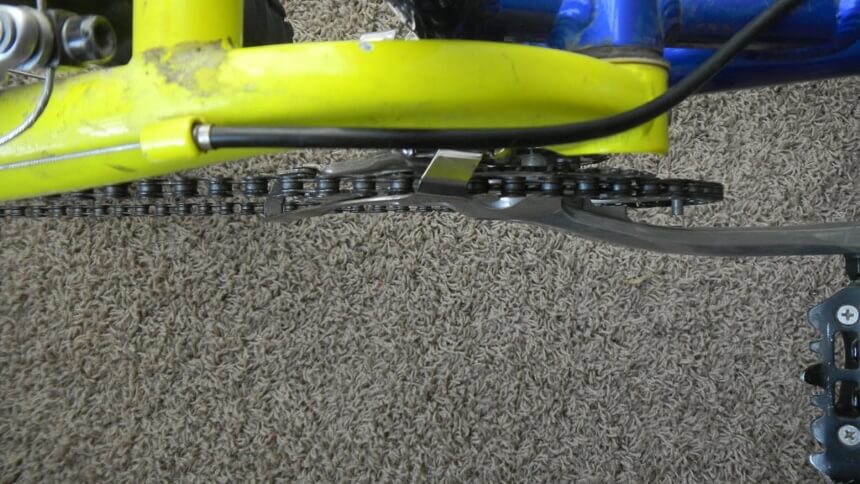
If you notice that your chain frequently rubs against the inside of the plate, you will have to modify the screw of the letter L and tighten or loosen it gradually until you notice that the friction and rubbing disappear.
Remember that by tightening the screw, the derailleur will suffer a slight displacement towards the outside of the bike while, if you loosen it, you will notice how it moves towards the inside of the frame.
You will have to calculate the adjustment to the point of achieving that the chain is one millimeter away from the inner plate. At this point, no friction is allowed because it can alter the operation of the plate change.
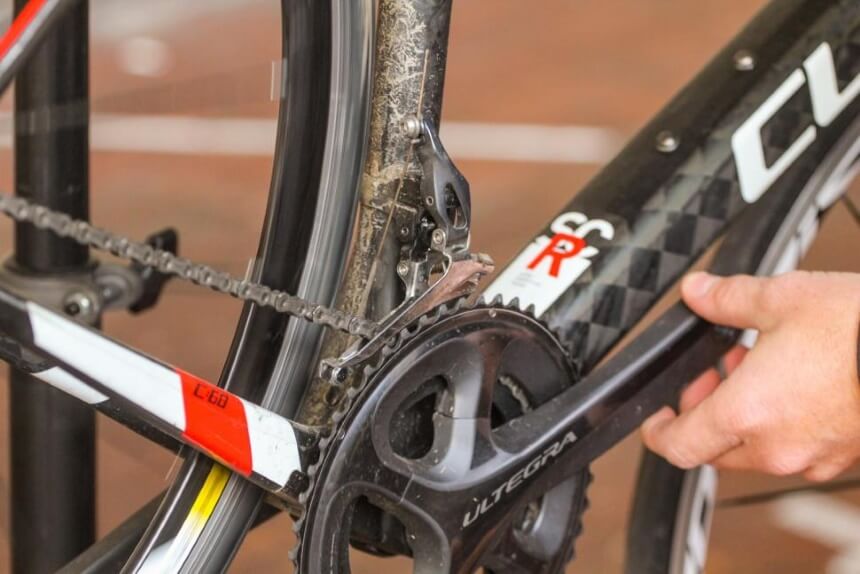
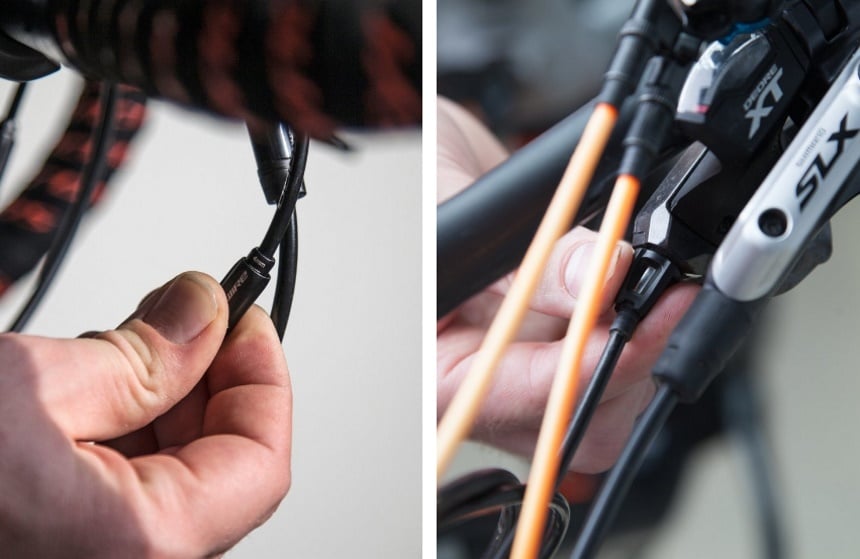 The adjustment also requires locating the chainwheel cable in the famous set screw on the front derailleur. When you purchase a new front derailleur, there should be clear diagrams showing the correct cable routing in your instruction sheets.
When you install the cable in said bolt, you can change the chainring from small to medium and then proceed to modify the drive tensioner to make sure that the derailleur does not hit the chain again.
It is very common that when you are rolling, you notice that the change of configuration does not allow you to go from middle chainring to big chainring. This phenomenon is due to the high-speed screw being too tight, so it is necessary to loosen it a bit to extend the operating range of the upper stop.
But beware! Some hobbyists go overboard with loosening to such an extent that the chain slips off and falls off the outside of the larger sprocket during gear changes.
You must adjust the screw H until the transition between the chainrings is made naturally and quickly, and the chain does not rub against the outside of the front derailleur.
Apply these basic maintenance steps every time you notice that the plate diverter system has some type of lock.
Efficient derailleur and gear behavior will allow you to ride more comfortably.
We show you how to correctly adjust the derailleur.
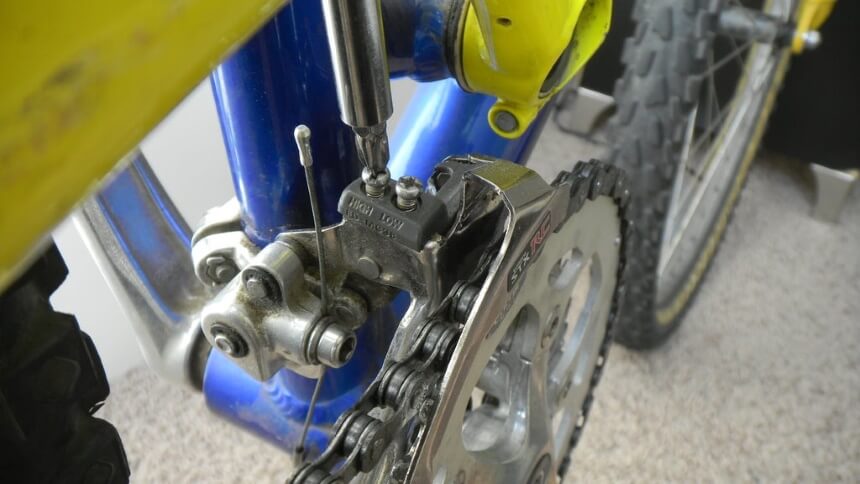 The H-screw limits the swivel range of the front derailleur to the right so that the chain cannot fall outwards over the large chainring.
 The L-screw limits the range of action of the derailleur inwards. This prevents the chain from falling over the small chainring towards the bottom bracket when shifting.
 Depending on the frame shape, the derailleur can be hinged from above or below (dual pull) or from the front (front pull). In any case, the train should be clamped with about six to seven newton meters.
 Suppose you turn the tension screw on the shift lever counterclockwise, the tension on the derailleur increases. This makes it easier for the chain to climb onto the larger chainring.
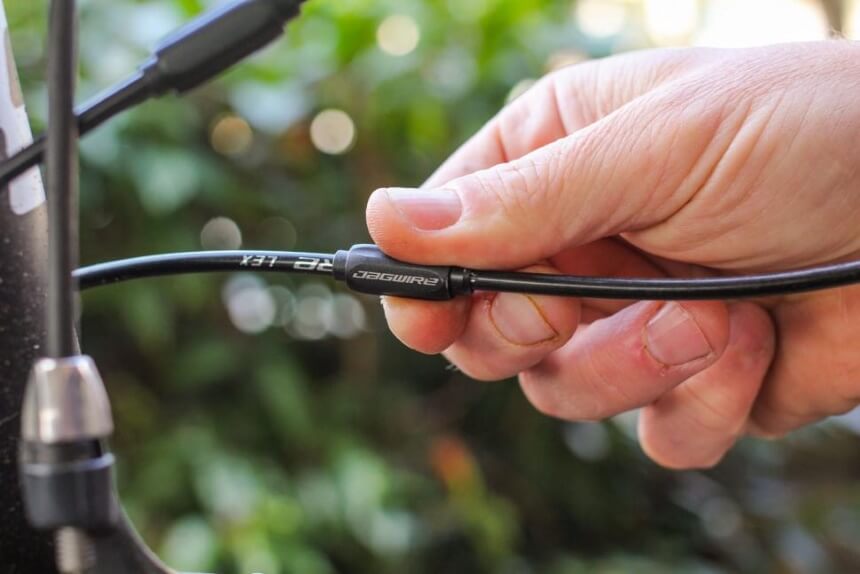 If you remove the small grub screw on the shift lever (Shimano), a new shift cable can be threaded in. To do this, the gear lever must be in its relaxed position – i.e., the small chainring.
Riding a bike is a real pleasure, and you will enjoy it much more if your gears work efficiently and quietly by following our tips on how to install front derailleur. Proper installation and adjustment of the front derailleur can take time. Be patient and make small adjustments at the same time.
The cables get stretched after a few rides. Tighten again within a month of installation. Make sure your cable and derailleur are securely anchored. It is dangerous to loosen up during a ride.