Mountain Bike Tire Pressure: How to Determine the Right Pressure?

This article will help you better understand how your mountain bike works and allow you to use it to its full capacity.
By
John Watson
John Watson
Writer
John is an experienced cycling enthusiast and a great asset when it comes to writing skills. He's a Bachelor of Arts and a talented journalist. John is in charge of our blog read more
reviewed
Reviewed By
Jessica Kingston
Jessica Kingston
Expert Consultant
Jessica is our expert consultant on all things connected to biking - gear, technique, you name it. Being a pro cyclist in the past, she knows exactly how things work in and read more
Last updated: August 23, 2023
Bike The Site is reader-supported. We may earn a commission through products purchased using links on this page. Learn more about our process here

If you ride a mountain bike regularly, you’ll want to know a bit about your bike. This includes knowing the right amount of mountain bike tire pressure. A mountain bike is designed to handle rough terrains better than any other type of bike.

So, it would make sense for your tires to handle the rough and tumble of rocks, gravel, and the unevenness of the terrain. If you are finding yourself always pumping air into your tires, you’ll want to use this guide to ensure that you lessen that occurrence.

It may be hard to tell how much pressure is necessary without knowing the facts. The good news is we will be able to help you with that. We’ll discuss the best amount of pressure you can work with and what kind of factors can influence it. Let’s get right to it!

What is the best pressure for your mountain bike?

This is a question that always gets asked a lot. Cutting to the chase: there is no ‘magic number.’ In terms of tire pressure, the balance is something that will matter most. Another thing to note is that you want to have enough tire pressure to where the tires can be able to maintain good stability and grip when you are making turns.

Keep in mind that when riding a mountain bike, you’re dealing with rough terrain that will be consistently uneven. Not to mention, you’ll have rocks that may be sharp enough to create punctures (which is the last thing you need).

Another thing to consider is the type of tires you may have. There are two kinds of tires for mountain bikes Trusted Source Cycling - health benefits - Better Health Channel Cycling can help to protect you from serious diseases such as stroke, heart attack, some cancers, depression, diabetes, obesity and arthritis. www.betterhealth.vic.gov.au : tubed and tubeless. If you have tubed tires, you may want to add a bit more pressure compared to those with tubeless tires (specifically 3 to 5 psi more). Tubed tires may also be at risk of punctures such as ‘snakebite punctures.’

Whether you have tubeless or tubed tires, it’s better to test your tire pressure out in the field. As a good starting point, you should have 28 psi in your front tire and 30 psi in the rear. Once the tires are inflated at those levels, go for a ride.

You’ll want to make some observations as you go. This includes how well it does on gravel, the number of occurrences that the rim is getting hit, or how harsh the trail is. Not every mountain biking trail is created equal, and some may be rougher than others.

It may sound like a lot to take in in terms of field testing. However, you want to make a determination of whether or not 28/30 psi (front/rear) may be enough or if you need to change it up a bit. If needed, you can subtract 2 psi from each tire and repeat the same process until you are satisfied.

The goal here is to find the psi that you are comfortable with when riding your mountain bike. Pay attention to when the increase in performance ends. If the tires are no longer as stable as you want them, that’s when you’ll know which psi is enough for your tires.

What factors can influence tire pressure?

We’ll be taking a look at several factors that will influence tire pressure. This will give you an understanding of each part of your tires, such as the measurements, the terrain it can handle, and other factors. Let’s break down each explanation piece by piece, so you get a simple understanding as to how each factor influences tire pressure.

Bike and rider weight

Needless to say, the tires will be dealing with the weight combination of you and your bike. The heavier the weight, the more pressure your tires will likely have. That’s why we stress doing as much field testing as possible before you decide on a psi that will work best for your tires.

The heavier weight will apply more force. Likewise, lighter weight can allow you to get away with less tire pressure.

Here is a mountain bike tire pressure chart depending on the rider’s weight.

Weight DH Enduro Trail XC
40-50kg 14 psi front, 18 psi rear 15 psi front, 19 psi rear 16 psi front, 20 psi rear 17 psi front, 21 psi rear
50-60 kg 15 psi front, 19 psi rear 16 psi front, 20 psi rear 17 psi front, 21 psi rear 18 psi front, 22 psi rear
60-70 kg 17 psi front, 20 psi rear 18 psi front, 21 psi rear 19 psi front, 22 psi rear 20 psi front, 23 psi rear
70-80 kg 19 psi front, 21 psi rear 20 psi front, 22 psi rear 21 psi front, 23 psi rear 22 psi front, 24 psi rear
80-90 kg 22 psi front, 23 psi rear 23 psi front, 24 psi rear 24 psi front, 25 psi rear 25 psi front, 26 psi rear
90-100 kg 23 psi front, 25 psi rear 24 psi front, 26 psi rear 25 psi front, 27 psi rear 26 psi front, 28 psi rear
100-110kg 25 psi front, 27 psi rear 26 psi front, 28 psi rear 27 psi front, 29 psi rear 28 psi front, 30 psi rea

Terrain

Obviously, the terrain will differ from one location to the next. The rougher the terrain, the more challenging of a test it can be on your tires. If you have a habit of riding on super rocky terrain, it will make sense to up the pressure a bit. You’ll be less likely to face the risk of punctures if the tire pressure is a bit higher. Now, does this mean the tire pressure should be the same if you are riding on smoother terrain? You could lessen the air pressure if you’re on smoother ground more often.

Dry and wet terrain can also be a difference-maker as well. Your tire pressure will need to handle not just the dry terrain but also the wet terrain as well. Wet terrain could add a bit more strain to your tires as you ride through the muck of unpaved pathways. But it may not seem to matter if you are on smoother terrain.

If you prefer on-road mountain biking, the closer to 50 Psi tire pressure is more suitable for you. If you mix both on-road and off-road biking, then pump them between 30 and 50 psi

Riding style

Mountain Bike Tire Pressure: How to Determine the Right Pressure?
The riding style may be far less relevant of a factor compared to others. However, it doesn’t mean you should disregard monitoring your tire pressure because of your riding style.

Not every mountain biker will have the same riding style as you. However, the riding style could play a role in the tire pressure. If you are dealing with plenty of obstacles, more tire pressure should be sufficient. Lesser obstacles can allow you to get away with less pressure assuming you are able to navigate them when present.

How does tire construction influence tire pressure?

Now that we’ve talked about the factors, we’ll also be talking about the construction of your tires. Indeed, construction has its own set of factors that can influence pressure. The construction of your tires can also determine your decision on which tires to go with when shopping around for a new pair. With that said, let’s go deep into which element of tire construction influences tire pressure and why:

Tire width

The wider the tire, the more pressure it will need. There is no other way to say it. Wider tires will need to be on wider rims. Likewise, narrow-width tires and narrow frames will require lesser amounts of pressure.

What you’ll want to remember is that tires of higher volume can handle lower pressures to an extent. You need to know how much is considered too little. If the tires are moving excessively, you’ll know that you have to increase the pressure to get it to stop.

Below you can see the MTB tire pressure chart for both tubed and tubeless tire pressure for mountain bikes:

Low Psi – Tubed – High Psi Low Psi – Tubeless – High Psi
24” 25-35 40-50 14-18 40-50
26” 25-35 40-50 16-20 40-50
28” 30-40 45-55 18-22 45-55
Fat bike tires 20-30 40-50 10-20 30-40

Narrow tires typically are measured at around 2.2 inches. Meanwhile, wider tires will be approximately 2.4 inches and up. Keep this in mind when you are on the hunt for new tires that you can add to your bike. But that’s not the only thing you need to pay attention to.

Rim width

The rim width and the tire width indeed go hand in hand. A narrow tire on a wide rim or a wide tire on a narrow rim can feel out of place. For these reasons, it’s a no-brainer that better performance is acquired when both tires and rims are wide themselves.

With that said, what are the measurements we need to know about tires and rims? Can they work together to ensure optimal performance?

If the tire width is measured at 2.8 inches, they should be on rims that are measured no less than 35mm. Starting our way down, 28 to 35mm wide rims can handle tires that are at least 2.5 inches in width (but no higher than 2.6 inches). A 2.4-inch tire can do fine on rims that are 25mm, but anything above 30mm would be excessive.

Mountain Bike Tire Pressure: How to Determine the Right Pressure?
2.2-inch tires will be sufficient on narrow rims. Specifically, you’ll want those rims to be south of 25mm. If you are looking for replacement rims, make sure they are a match for the tire width.

Tire carcass

The tire carcass is defined as the framework of the tire. In other words, it’s the overall construction. They differ from tire to tire and are designed for different uses. One tire carcass designed for rougher terrain will be way different compared to those designed for smoother surfaces.

Thicker carcasses will be great for those riding on uneven terrains. The reason being is that it can sustain plenty of rough terrains that would otherwise cause punctures on tires that have thinner carcasses. As you would expect, a thicker carcass will be a bit heavier in terms of weight and feel.

A thicker carcass is stronger. So, it could make sense if you decide to ride your bike with a little less pressure. Still, you don’t want to ride under too little pressure. Just because you have a good amount of protection, the overall performance can still suffer.

If you have a thinner carcass, a higher pressure will make a ton of sense here. That’s your best solution against punctures. If grip and comfort are something you hold in high regard, a thinner carcass definitely will be the best choice.

The carcass you choose will be based on balance. Furthermore, you want to consider the overall grip, puncture protection, and weight. Take note of how often you ride on rougher terrain compared to smoother terrain. This will give you the answer to which carcass will serve you best.

Tire compound

The tire compound is the blend of materials that create the tire’s rubbery material. Keep in mind that the compound of bike tires will differ as some will be softer than others. Tires of a soft compound can give you more grip and speed. However, any tires that are harder in the compound will be more durable and stable.

If you have a soft compound tire, it will make sense to add a bit more pressure to it. That way, you’ll be able to get an excellent grip while being able to protect it from punctures. Yes, more pressure will add on more stability as well.

Should you pump up rear tires harder than the front?

The short answer: yes. The long answer, it’s not really a requirement. Yet, it is highly recommended that you do. The reason for this is that rear tires will be handling the brunt of the abuse. Not to mention, the rear tires are more likely to be punctured as opposed to your front tires. In terms of weight distribution, rear tires will have more drag.

Indeed, the front tires will be useful when you are rounding the corners or slowing down. Thus, it can require less pressure compared to the rear tire. For better puncture protection, a rear tire should have slightly more air.

How to know that the pressure is right?

Mountain Bike Tire Pressure: How to Determine the Right Pressure?
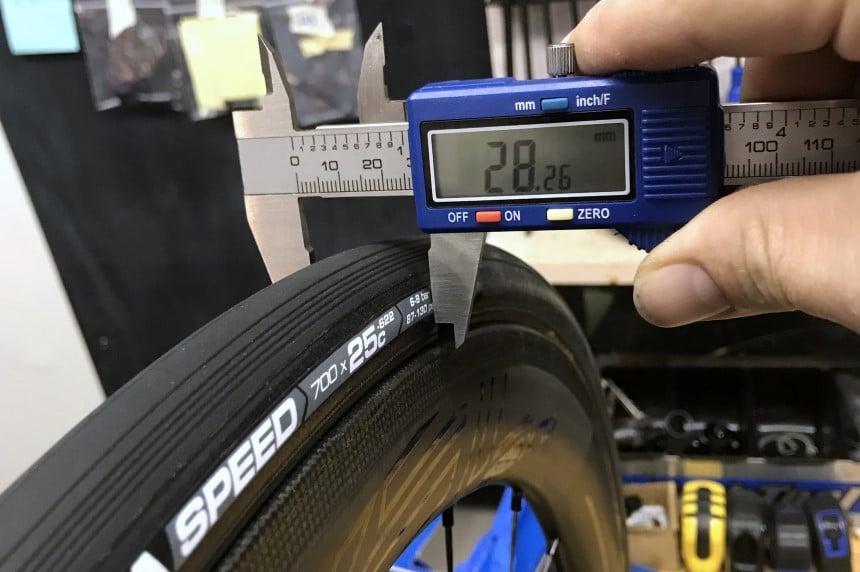
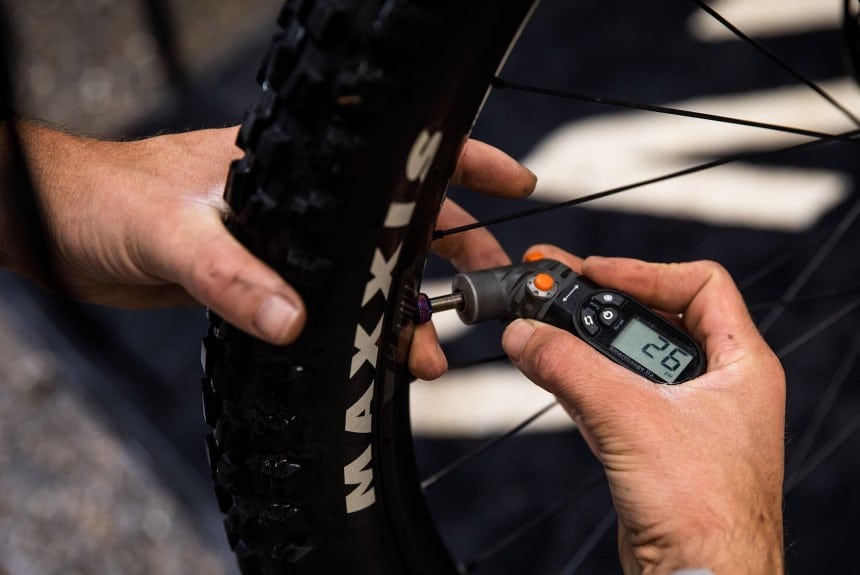
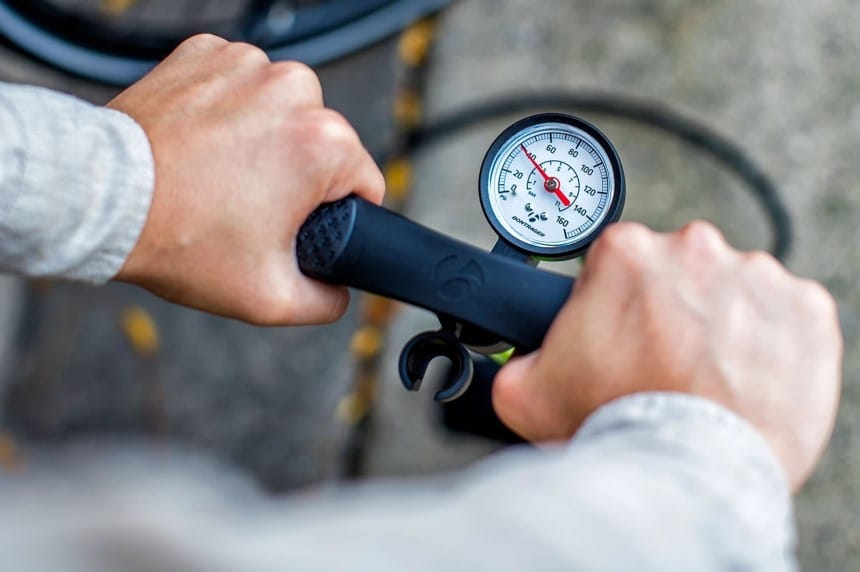
If you haven’t done the field test that we’ve suggested earlier, don’t worry. We’ll be able to give you a good starting point in a bit. Let’s remind ourselves that it could depend on whether or not you are running tubed or tubeless bike tires.

Tubeless tires do give you more protection against punctures. Plus, your ride quality will be better because it takes out the friction equation that you would otherwise find in tubed tires. You can even get away with riding around with lesser amounts of pressure.

If you are running tubed tires, it may be a good idea to consider switching to tubeless. Especially when you are finding yourself more on rougher trails, once again, start off with 28/30 psi (front/rear) and field test different levels until you find one that will work to your advantage in terms of overall performance.

To ensure that the pressure is right, test it on different levels of terrain. Don’t be afraid to try it out on steep, rocky hills. Travel on flat, smooth roadways. Or go flat but rocky. Either way, there’s plenty of opportunities to test everything out.

But to be on the safe side, add a good amount of air to where you are able to prevent most punctures while giving yourself plenty of stability to work with. If the pressure is too high, your tires may feel a bit uncontrolled.

Pressure guide for mountain bikes

Let’s remind you that there is no magic number when it comes to tire pressure. That’s because there are variables depending on the rider and the tires themselves. As mentioned before, we will give you plenty of starting points depending on the tires you use.

Before we get started, remember that your rear tires will need more psi compared to front tires. Now, let’s discuss the starting psi for both tires based on the following examples:

  • If you have a bike that allows you to arrive on mixed terrains and conditions and have tires measured at 2.4-inch tires, you’ll want to be riding on rims that are at least 25mm. If you need a good psi starting point, 21/23 psi might just be what you’ll need. This should be enough to give you plenty of control, stability, and grip.
  • If you are going for something wider, consider going 19/21 psi. While it may seem like a little less pressure compared to the narrower tires, you can get away with it since the tires are a bit wider and are likely to resist punctures.

One thing to take note of is the conditions the terrain may be in. The day of or the day after rainfall can create wet terrain. For this reason, consider dropping the air pressure if you are running on wide tires.

As always, it’s a good idea to keep a tire gauge handy. Preferably, we suggest that you keep a digital tire gauge to ensure better accuracy. It will also help you determine if you need to make some adjustments to the pressure (such as increasing or decreasing it).

Mountain Bike Tire Pressure: How to Determine the Right Pressure?
If you do not have a digital tire gauge, purchase one as soon as you can. This will be an excellent tool to use before every bike ride or if you are noticing any change in performance. You could be losing air during the ride and may need to use the tire gauge.

A regular, old-school tire gauge might not be as accurate. If you have both, test it out and see for yourself. As technology advances, digital gauges may prove to be the favorable choice.

Experimentation is key when it comes to finding the right tire pressure. However, you want to take into account the size of your tires and rims in order to get the right kind of air pressure into your tires. Just enough for one type of tire may be too much or too little for another.

Final Thoughts

Finding the right mountain bike Trusted Source The Mountain Bike Cure: Exercise, Fresh Air and Fellowship Thanks to more trails, better bikes and a rise of high-school interest, mountain biking has experienced a meteoric rise of popularity in the past decade. The pandemic added fuel to the fire. www.nytimes.com tire pressure can be a challenge if you don’t know the facts. However, it’s important to test out the amount of pressure depending on the tire size and rims. That doesn’t stop there. The air pressure will play a role in how well the tires perform.

Keep in mind there are other factors such as the weight of the bike and the rider. The terrain patterns and conditions will also affect the performance and overall tire pressure. If anything, consider making the switch to tubeless tires if you are on tubular. This will lessen the friction as well as the occurrences of inflating your tires.

As always, testing is key. Especially when you switch out new tires or try out new psi levels, when finding new bike tires, consider factors such as width, carcass, and the tire compound, among others. This will help not only with performance but also prevent any punctures from happening should you decide to venture on rougher terrains.

Whether you like to ride the rough terrain or keep it smooth, there’s always an opportunity for you to make adjustments. Deflate the tires, inflate them, or whatever you see fit depending on your riding plans. Also, it’s important to consider the current terrain conditions. It may have rained hours before, thus making the ground wet enough to pose a challenge for the tires.

Always remember, the rear tires will need more air than the front tires as it takes quite a beating. But do not neglect the front tires as it’s responsible for your braking and cornering.

References

1.
Cycling - health benefits - Better Health Channel
Cycling can help to protect you from serious diseases such as stroke, heart attack, some cancers, depression, diabetes, obesity and arthritis.
2.
The Mountain Bike Cure: Exercise, Fresh Air and Fellowship
Thanks to more trails, better bikes and a rise of high-school interest, mountain biking has experienced a meteoric rise of popularity in the past decade. The pandemic added fuel to the fire.

Leave a comment

Your email address will not be published. Required fields are marked *